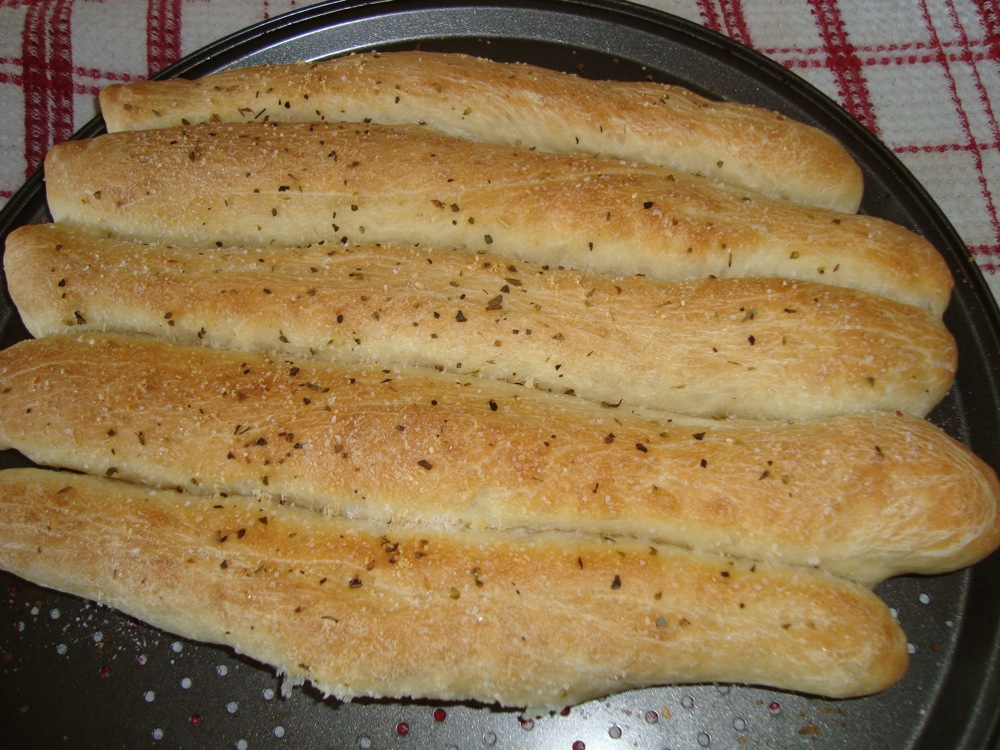
So a while ago we somehow ended up with absolutely nothing that we could have for lunch. We were busy working and cleaning and hadn't planned on doing groceries until the next day. We did have food but it consisted of mostly frozen meat, cereal and a couple of apples. There was no cheese, bread, deli meat or pasta. No potatoes for a quick batch of fries. What we did have was baking supplies, a bit of butter, garlic, a teeny bit of Italian seasoning and about a tablespoon of Parmesan stuck to the bottom of the tub.
We were pretty hungry (and also busy) so I didn't take any photos of the process and as you can see we already ate a bunch of what was there on the pan! These were easy to make, not much work at all, just a bit of waiting so we had some apples with almond butter while we waited and cleaned.
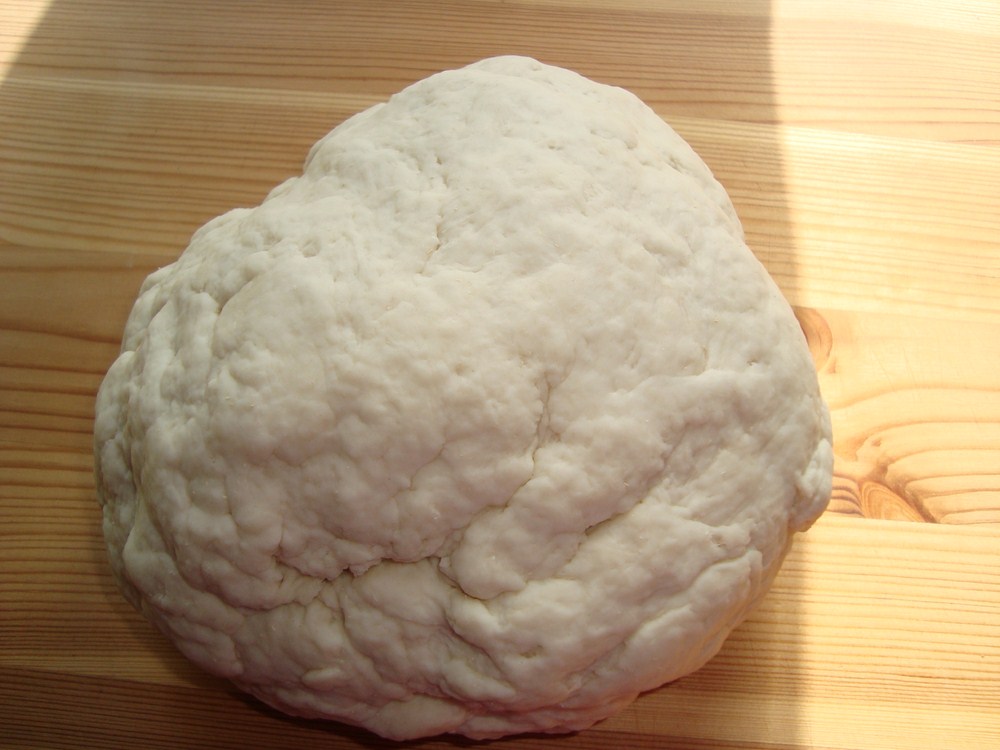
Just start by mixing up a batch of pizza dough. No need to let it sit and rise before you work with it this time though. I did mine 2 different ways. Jon wanted breadsticks and I wanted garlic bread so I cut the dough into 2 pieces, I half I flattened into a pie plate, the other half I rolled into sticks. Then I covered them with a clean tea towel and let them sit to rise for about 45 minutes or so.
When the time was up I turned my oven on to 400 and made my garlic butter. I just finely chopped a large garlic clove and microwaved it in about 2 tablespoons of butter. I brushed a bit over the breadsticks and then cut some grooves into the loaf of garlic bread and poured the rest over the top. Then everything got a sprinkle of Italian seasoning, Parmesan and sea salt. I popped them into the oven for about 20 minutes, the garlic bread needed an additional 5 due to the thickness.
These were sooo good even though we didn't have anything to use for a dipping sauce. We ate all of the garlic bread right away since it was so moist and garlicky, the breadsticks went with chili that we had for dinner.
I can't wait to try making these again, I'll probably just use a half batch of dough to do the garlic bread and add some cheddar on top to make garlic cheese bread.
The surprising adventures of a young self-employed family!
Waste less. Save more. Get smarter. Make things.
Showing posts with label baking. Show all posts
Monday, October 31, 2011
Pizza Dough Breadsticks
Monday, October 24, 2011
Carrot Cake with Cream Cheese Buttercream Frosting
Lady LaLa (Alice) just turned a year old. Of course I made her a cake, I wasn't about to go out and buy her something from the store. I find that store bought cakes tend to have a way too sweet, greasy feeling frosting that seems like it's made with lard instead of real butter and usually only come in 2 flavors: white or brown. Not to mention the preservatives and whatnot they may contain, not something I want to give to a one year old. I could have made her a cake from a box but I wanted something with real veggies in it.
Monday, October 10, 2011
Red Velvet Brownies with Buttercream Frosting
I've been spending an obscene amount of time on Pinterest lately, mostly just drooling over food and bookmarking recipes. I noticed that a lot of people are apparently obsessed with red velvet things and these brownies kept popping up over and over again. I figured I would give it a try, something a bit different than the usual brownies and blondies and whatnot. It was originally with white chocolate buttercream but I substituted it with the buttercream recipe that I've always used. I don't like white chocolate so I don't have any around.
Pardon the lack of pictures of the process, we had an early start to the day, I already had them out of the oven before I realized I should have taken pictures of what I was doing
Here's what you need:
For the brownies
Preheat your oven to 350 and grease and flour a pan, a smallish one, 8x8, 6x10, whatever you have. I used my springform pan because it's easier to get stuff out of.
Start the brownies off by mixing together the butter, sugar and vanilla until it's creamy. Then add the cocoa powder and food coloring, when that is combined beat in the egg and salt. Now you can add the flour, you're going to have to stop and scrape the sides of the bowl a couple times to make sure everything is red. Pour into your pan, my batter was pretty thick and I had to use a spatula to spread it around.
Bake for 30-40 minutes, a toothpick or knife should come out clean when you stab the brownies. I think mine went for about 45 minutes due to baby shenanigans and were too dry and a bit too dark on the bottom. 35 minutes probably would have been perfect.
Let the brownies cool completely before attempting to remove them from the pan, about an hour should do it. If you put the frosting in the fridge then take it out and let it sit for the hour as well and it should be ready to use. Frost, slice and serve!
*I only used about half the frosting, the rest went into the fridge for a carrot cake that I'm making soon.
The verdict on these brownies? Eh. Not great, I don't really see what the fuss is, is it just because they are red? I know I overcooked mine but the flavor really wasn't anything special, just very mildly chocolatey. Maybe I'm just used to more chocolate in my desserts?
Pardon the lack of pictures of the process, we had an early start to the day, I already had them out of the oven before I realized I should have taken pictures of what I was doing
Here's what you need:
For the brownies
- 3 tablespoons cocoa powder
- 2 tablespoons red food coloring
- 2 teaspoons vanilla extract
- 1/2 cup soft unsalted butter
- 1 1/2 cups sugar
- 2 eggs
- 1 1/4 cups flour
- 1/4 teaspoon salt
- 1/2 cup soft unsalted butter
- 1 small bag of powdered sugar ( about 2 cups)
- 1 teaspoon vanilla extract
- 2 tablespoons cream ( I used the 18% that we have for coffee)
Preheat your oven to 350 and grease and flour a pan, a smallish one, 8x8, 6x10, whatever you have. I used my springform pan because it's easier to get stuff out of.
Start the brownies off by mixing together the butter, sugar and vanilla until it's creamy. Then add the cocoa powder and food coloring, when that is combined beat in the egg and salt. Now you can add the flour, you're going to have to stop and scrape the sides of the bowl a couple times to make sure everything is red. Pour into your pan, my batter was pretty thick and I had to use a spatula to spread it around.
Bake for 30-40 minutes, a toothpick or knife should come out clean when you stab the brownies. I think mine went for about 45 minutes due to baby shenanigans and were too dry and a bit too dark on the bottom. 35 minutes probably would have been perfect.
Let the brownies cool completely before attempting to remove them from the pan, about an hour should do it. If you put the frosting in the fridge then take it out and let it sit for the hour as well and it should be ready to use. Frost, slice and serve!
*I only used about half the frosting, the rest went into the fridge for a carrot cake that I'm making soon.
The verdict on these brownies? Eh. Not great, I don't really see what the fuss is, is it just because they are red? I know I overcooked mine but the flavor really wasn't anything special, just very mildly chocolatey. Maybe I'm just used to more chocolate in my desserts?
Thursday, October 6, 2011
The Best Chocolate Chip Cookies!
It's true, these really are the best chocolate chip cookies I've ever had. I was pretty sick of the recipe I had for chocolate chip cookies, they never turned out the same and most of the time they were all thin and spread out and weird. I Googled and this recipe kept popping up over and over again. So I made it and it was awesome and made really soft, chewy cookies. I will use this one forever. I've even cheated and made it with margarine when butter wasn't a decent price and it was still pretty good. I recommend using real butter though, they just taste better!
Start by preheating the oven to 325 and gathering your ingredients:
Start by melting the butter and mixing it with the sugar and vanilla for a few minutes until it's nice and fluffy, then beat in the eggs. Combine all of the dry ingredients in a separate bowl and add to the mixer. Mix until just combined ( it should look pebbley) and then add the chocolate chips and give it another quick mix. You don't want to overmix it, the dough will be tough and the cookies will be hard.
Grab a good sized handful of dough and lightly flatten it into a "cookie patty", no need to roll it into a ball or anything. Bake at 325 for 16-20 minutes. Make as many as you want and freeze the rest of the patties for whenever you get a cookie craving.
Start by preheating the oven to 325 and gathering your ingredients:
| Stuff you need |
- 2 cups flour
- 1/2 teaspoon baking soda
- 1/2 teaspoon salt
- 3/4 cup melted unsalted butter (if all you have is salted butter or margarine skip the salt in the recipe!)
- 1 cup packed brown sugar
- 1/2 cup white sugar
- 1 tablespoon vanilla
- 1 egg
- 1egg yolk
- an entire bag of chocolate chips (I used this bag of Caramilk thingies I had in the freezer)
| Butter, sugar, vanilla and egg |
| Dry ingredients added and just barely mixed |
| Your finished dough |
| Chopped Frozen Tiny Caramilks |
Grab a good sized handful of dough and lightly flatten it into a "cookie patty", no need to roll it into a ball or anything. Bake at 325 for 16-20 minutes. Make as many as you want and freeze the rest of the patties for whenever you get a cookie craving.
| Handful of dough |
| Squish! |
| 4 cookies for us to nom right away about to go in the oven |
| The rest can go in the fridge or freezer |
| Hot cookies! |
| OM |
| NOM! |
Wednesday, September 14, 2011
Chocolate Peanut Butter Brownies
This is a recipe I've been meaning to get around to making for quite a while. Like most recipes it's one that I found online and modified to fit ingredients that I have around or to exclude things I don't like. I rarely ever do chocolate things because I honestly didn't bother picking up cocoa powder until today and chocolate chips are pretty expensive.
Ingredients:
Mix the sugar with the melted butter and vanilla, then beat in the peanut butter and then the eggs. You might have to scrape the bowl to get all of the peanut butter into the batter. Now mix in your chocolate. If you want to add some chopped up peanuts now is the time to do that!
Now mix in the salt and flour until just combined. I had to stop when it was half mixed to scrape the sides of the mixer again. The batter is thick!
Lightly grease whatever pan you are going to use, I'm using an 8 inch springform pan because I like to cut my brownies like slices of pizza. It makes them taste better! I swear, it really does! Dump the batter into the pan and spread it out with the spatula or your hands if you don't have a spatula.
Bake at 375 for 30 minutes. Turn halfway through if your oven is like mine and is hotter towards the back.
These were pretty good, mine could have used more chocolate chips because it was more peanut buttery than chocolatey. One thing I discovered, filling a brownie with peanut butter makes them REALLY heavy.
Ingredients:
- 2 eggs
- 1 cup peanut butter (I used chunky)
- 1 cup melted butter or margarine
- 2 cups brown sugar
- 2 teaspoons vanilla
- 2 tablespoons cocoa powder
- chocolate chips (as much as you like, I only had about a half cup left)
- 1/2 teaspoon salt
- 2 cups flour
Mix the sugar with the melted butter and vanilla, then beat in the peanut butter and then the eggs. You might have to scrape the bowl to get all of the peanut butter into the batter. Now mix in your chocolate. If you want to add some chopped up peanuts now is the time to do that!
Now mix in the salt and flour until just combined. I had to stop when it was half mixed to scrape the sides of the mixer again. The batter is thick!
Lightly grease whatever pan you are going to use, I'm using an 8 inch springform pan because I like to cut my brownies like slices of pizza. It makes them taste better! I swear, it really does! Dump the batter into the pan and spread it out with the spatula or your hands if you don't have a spatula.
Bake at 375 for 30 minutes. Turn halfway through if your oven is like mine and is hotter towards the back.
These were pretty good, mine could have used more chocolate chips because it was more peanut buttery than chocolatey. One thing I discovered, filling a brownie with peanut butter makes them REALLY heavy.
Monday, September 5, 2011
Homemade Sweet Cornbread
This is great for breakfast or as a snack with tea. It's quick and easy to make and you can make it sweet or savory. This time I went with sweet but next time I may do savory with some cheese and green onion to go along with soups and chili that are coming up on the menu later in the month. Sorry, no photos of the process this time.
Start by making a cup of buttermilk if you don't keep any in your fridge, pour it into your bowl or mixer and add the cornmeal. Let the cornmeal soak for a couple of minutes while you get the other ingredients ready and preheat the oven to 400.
Now add the sugar and oil, mix for a bit and then add the egg and mix. Now add all of the dry ingredients and mix until just combined. The batter should be quite thick, pour into a lightly greased pan and thump the pan on the counter to even out the batter a bit. Bake at 400 for 20-25 minutes. Mine baked for 22 minutes and was perfect.
For savory cornbread:
- 1 cup buttermilk
- 1/3 cup canola oil
- 1 egg
- 1 cup cornmeal
- 1 cup flour
- 1/2 cup white sugar
- 1 teaspoon salt
- 3 teaspoons baking powder
Start by making a cup of buttermilk if you don't keep any in your fridge, pour it into your bowl or mixer and add the cornmeal. Let the cornmeal soak for a couple of minutes while you get the other ingredients ready and preheat the oven to 400.
Now add the sugar and oil, mix for a bit and then add the egg and mix. Now add all of the dry ingredients and mix until just combined. The batter should be quite thick, pour into a lightly greased pan and thump the pan on the counter to even out the batter a bit. Bake at 400 for 20-25 minutes. Mine baked for 22 minutes and was perfect.
For savory cornbread:
- Only use 1 tablespoon of sugar instead of 1/2 cup, you could also up the salt to 1 1/2 teaspoons if you like
- Add 1/2 cup cheddar cheese and a chopped green onion as well as a shake or 2 of cayenne pepper
- Try cheese and diced jalepenos
Friday, September 2, 2011
30DC2 - Day 2
Here's a wrap up of day 2
I entertained Alice while Holly slept in a little until my vocal recording session.
Holly built some cornbread which we ate for lunch. A recipe is forthcoming.
In the afternoon we went out to get a couple cases of diapers from London Drugs because they were on sale and we had coupons. Coffee was also on sale and we had a coupon for that too.
The floor was swept, the pet houses were cleaned, laundry and dishes put away.
Groceries Day 2
London Drugs - 1KG Melitta Espresso Roast Whole Bean Coffee $6.99 (usually $14.99)
We don't count diapers as groceries.
Tomorrow the plan is:
Dishes
Laundry
Crickets for pet food (really long walk booo!)
a few grocery items to pick up
Pay Hydro bill
a few hours of work
Sunday I have some audio work and Monday is a pretty busy day with a photoshoot, a podcast and more.
I entertained Alice while Holly slept in a little until my vocal recording session.
Holly built some cornbread which we ate for lunch. A recipe is forthcoming.
In the afternoon we went out to get a couple cases of diapers from London Drugs because they were on sale and we had coupons. Coffee was also on sale and we had a coupon for that too.
The floor was swept, the pet houses were cleaned, laundry and dishes put away.
Groceries Day 2
London Drugs - 1KG Melitta Espresso Roast Whole Bean Coffee $6.99 (usually $14.99)
We don't count diapers as groceries.
Tomorrow the plan is:
Dishes
Laundry
Crickets for pet food (really long walk booo!)
a few grocery items to pick up
Pay Hydro bill
a few hours of work
Sunday I have some audio work and Monday is a pretty busy day with a photoshoot, a podcast and more.
Tuesday, August 23, 2011
Coconut Macaroons (of failure)
I would try it again since my normal recipe calls for sweetened condensed milk which costs about $4 a can here and I wouldn't use for anything else. I normally have all the other ingredients around, I'll have to tweak it a bit and see how it turns out.
- 3 cups coconut
- 2 egg whites
- 1/2 cup white sugar
- 1 1/2 teaspoons vanilla
Preheat your oven to 325. Whisk together the sugar, egg whites and vanilla. Stir in the coconut. Scoop out teaspoon sized balls and heap onto a parchment paper lined baking sheet.
Bake for 20 minutes.
Thursday, August 18, 2011
Make Your Own Vanilla Extract
I am always out of vanilla extract. I never remember to pick up a bottle when I do the rest of my groceries since I don't need to go down the baking aisle for anything else. A little bottle of the fake stuff will cost you over $3 while a teeny bottle of the real stuff runs around $10. I think the bottle is under 100ml. You might get a dozen uses out of one just using 1/2-1 teaspoon per recipe. I've been using a splash of vanilla flavored soy milk when I bake but it's just not the same.
I remember seeing a post on Punk Rock Domestics where someone made their own vanilla extract but it was a few years ago and I couldn't find it. Google came through, there were tons of posts on how to make it, lots of different ways. I picked the method that seemed easiest and closest to what I remember seeing on PRD.
This is super easy, you just need a little patience. So here's what you need:
You need to slice down the middle of your vanilla beans so that you expose the innards and so that all the nice little flecks of vanilla bits can get into your vodka. I left the ends attached so that there are less big pieces to worry about when I go to use it.
Now open your vodka and add the vanilla beans. Now give it a good shake. If you don't have room to shake then you know what you have to do, pour yourself a shot.
Grab a sharpie and write the date on the bottle, I peeled off the label to make this easier and so that nobody accidentally takes a swig of vanilla extract thinking it's some fancy vodka. That would probably be pretty gross.
Now comes the hard part. You have to wait at least 2 months until you can use this stuff. I was bad and used a bit today for some coconut macaroons. I only made it a week ago, it smells like vanilla booze but thankfully the boozeyness baked off in the oven. It didn't have a really strong vanilla flavor yet.
If you're an avid baker you can have a couple of these on the go, maybe a month apart so that you always have one ready. If you don't go through it that fast you can keep topping the bottle off with more vodka! I'm not sure how many times you can fill it up before it starts to get weak, you could probably just taste it every so often.
So there's 1/3 litre of pure vanilla extract for $20! ($15 if you shop around for the best price)
I remember seeing a post on Punk Rock Domestics where someone made their own vanilla extract but it was a few years ago and I couldn't find it. Google came through, there were tons of posts on how to make it, lots of different ways. I picked the method that seemed easiest and closest to what I remember seeing on PRD.
This is super easy, you just need a little patience. So here's what you need:
| Cheap Vodka |
- Mickey of Vodka, 375ml. I bought the cheap stuff since I wasn't going to be drinking any. This one cost me about $13.
- Vanilla beans. I didn't shop around for these because I had to walk down Hastings with booze and a baby, I just grabbed the first ones I saw and got outta Dodge. These cost me $6.99 and are Madagascar beans. I saw them later at my local market for $3.49. I'll know for next time, if I ever manage to run out of vanilla again.
- Cutting board
- Sharp knife. This is my cute little fruit knife.
You need to slice down the middle of your vanilla beans so that you expose the innards and so that all the nice little flecks of vanilla bits can get into your vodka. I left the ends attached so that there are less big pieces to worry about when I go to use it.
| Slice the beans through the middle |
Now open your vodka and add the vanilla beans. Now give it a good shake. If you don't have room to shake then you know what you have to do, pour yourself a shot.
Grab a sharpie and write the date on the bottle, I peeled off the label to make this easier and so that nobody accidentally takes a swig of vanilla extract thinking it's some fancy vodka. That would probably be pretty gross.
Now comes the hard part. You have to wait at least 2 months until you can use this stuff. I was bad and used a bit today for some coconut macaroons. I only made it a week ago, it smells like vanilla booze but thankfully the boozeyness baked off in the oven. It didn't have a really strong vanilla flavor yet.
![]() |
| The color after 7 days |
So there's 1/3 litre of pure vanilla extract for $20! ($15 if you shop around for the best price)
Tuesday, July 5, 2011
Scrimpulous recommends cook books
Here is a short list of the cook books we have owned and loved or want to buy.
Classics
TV Chefs
From Great Food Bloggers
Classics
TV Chefs
From Great Food Bloggers
Tuesday, June 28, 2011
Easy Homemade Bagels
This recipe is easy and fairly fast for a yeast/bread recipe, especially if you happen to have a mixer since it does all the kneading for you!
Ingredients:
4 cups flour
1 tablespoon sugar
1 teaspoon salt
2 teaspoons instant yeast
1 tablespoon oil (I use olive)
1 3/4 cup warm water
Get all of the dry ingredients into the mixer and start it up on the lowest speed. Slowly drizzle in the oil and warm water. Let mix for about 5 minutes, it should make a nice elastic ball that shouldn't be sticky or crumbly.
Drop it onto your work table, pat it into an even shape and cut into 8. I'm doing 6 regular sized bagels and 4 mini ones to freeze for Alice to chomp on. Toss the pieces back into the mixing bowl and let them rest with a towel over the top for 15 minutes.
Now it's time to shape your bagels. Roll each piece of dough into a rope, overlap the ends and tuck and pinch. You can give each one a squish to even it out a bit so you don't have one side of the bagel that's all misshapen. It will get easier the more bagels you do. You don't really have to be gentle with this dough.
Once all the bagels are assembled let them sit another 15 minutes. Get a big pot of water on to boil and set your oven to 400.
Now you're going to boil your bagels. It seems weird but you're pretty much mostly cooking them this way and then finishing them off in the oven. If you have a big enough pot you should be able to do 4 at a time. Boil them 30 seconds per side and then plop them back onto their baking sheet with a slotted spoon. Pop them into the oven for 15-20 minutes, they should be just starting to turn a bit golden. You don't want them to brown or they will be too dry and hard.
There you go! Tasty bagels. Sometimes I like to substitute 1/2 cup of the regular flour with whole wheat flour, I'm sure you could add oats or flax seed or whatever else you like. If you want toppings such as poppy or sesame seeds just do an eggwash and sprinkle them on.
Subscribe to:
Posts (Atom)