Showing posts with label easy. Show all posts

Thursday, May 10, 2012

Taco Muffins are amazing


view full image
"Taco muffins"
Last night we tried out one of the billion recipes circulating around Pinterest, Taco Muffins. They were amazing.
Take your flour tortillas (we make our own lately) and cut out circles to fit in your muffin tins.
Fill with seasoned ground beef and cheese.
Bake at 400* until cheese is melted and tortilla edges are browned.
Remove from tray and top with sour cream, salsa, lettuce and tomato.
Devour instantly.

Saturday, January 21, 2012

Rich Frosted Chocolate Mug Cake

Lately I've really been enjoying making various mug cakes.  They are ready in just a couple minutes and make less dirty dishes than making a whole cake, not to mention that a whole cake would go to waste for us because there aren't enough people to eat it!

I think I've finally perfected the chocolate one the last time I made them so I'm going to present my recipe on the blog. Sorry, no pictures of the process since I made them quickly and late at night when the baby (oops, toddler now!) was resisting going to sleep. They were so rich and yummy!

Here's what you need to make 2. Just half the recipe if you are alone and have a chocolate craving. Or make the whole thing and devour it and feel sorry for yourself when you get the biggest stomach ache you've ever had in you life!


For the cake:
  • 1/2 cup flour
  • 1/2 cup sugar
  • 1/4 cup cocoa powder
  • 1/2 teaspoon baking powder
  • 1/4 cup milk
  • 1/4 cup oil
  • 1 teaspoon vanilla extract
  • 1 egg
  • a handful of random melt-able chocolate (we had these truffle things that we were given for Christmas so I used 6 of them) use whatever you have around, chocolate chips, half a mars bar, whatever, as long as you can microwave it!
I defeated the purpose of making cake in a mug by mixing my stuff in bowls, if I was only making one I would have mixed it in the mug, it's just easier to do it this way if you're making multiples!

Mix all of the dry ingredients together in one bowl and whisk the milk, oil, egg, and vanilla in another. Pour the wet into the dry and combine.  Now microwave whatever chocolate you are using until it's just melted and stir it into your batter. Pour half into each mug and microwave for 1 minute 45 seconds. You may have to play around with the time depending on your microwave, start with 1 minute and then add 30 seconds, it might be done after that long.

The cake and mugs are going to be very hot so they will have to sit for a bit, this gives you time to mix up the frosting. For this you need:

  • 1/2 cup icing sugar
  • 2 tablespoons cocoa powder
  • 1 tablespoon soft butter or margarine
  • 1/2 teaspoon milk or cream
Just mix everything together with a fork, easy as that! You can spread the frosting right onto the hot cake before serving or you can do what we did, our cakes were really deep so we just spooned on a dollop of frosting for every inch of cake we ate!

*A quick change for if you want brownies in a mug instead of cake, omit the baking powder and use 2 eggs instead of one

*Other yummy add-ins: sprinkle of cinnamon, teaspoon of instant coffee, caramel, a peppermint patty pushed halfway down into the batter, etc!

Sunday, December 18, 2011

21 Fast cheap and healthy snacks for you and your kids

I'm going to start off by saying that we've always been horrible when it comes to organizing meals other than dinner. We used to have our morning coffee/tea at 9 or 10, then maybe some cereal around 11 or 12 and then stare blankly at the cupboards and fridge around 2 or 3 when we were really hungry. This usually resulted in grabbing takeout, eating too much and then not having dinner until very late at night when the lunch food coma wore off. Not to mention that you really don't feel like doing much when you're very full so a lot of lazing around was going on.

We've drastically changed our eating habits now that Alice is with us, she's tiny and needs to eat small amounts more often since she's constantly on the go and growing. Everything needs to be healthy as well to fuel her little body and brain when she's playing hard. She also doesn't like to sit in her chair for extended periods of time and gets restless and throws her food when she gets bored.

Snacking also works a lot better for me than sitting down and eating a midday meal, snacks are faster to prepare, you can eat them on the go or while you work on things around the house and they keep my blood sugar even as I'm one of those people that gets dizzy and cranky between meals.

So here's a list of some of the things we have throughout the day between meals or as a small lunch.

  1. Veggies and dip - Celery, carrots, broccoli, cherry tomatoes and cauliflower with salad dressing. Ranch dressing is our favorite, caesar is tasty as well.
  2. Sliced fruit with dip - Apples, oranges, nectarines, peaches, strawberries, mangoes, etc. Try almond butter for apples and yogurt with a bit of honey for the softer fruit.
  3. Dry cereal - Cheerios, Honeycomb, Vector, Captain Crunch, etc. Not the healthiest option but pretty tasty.
  4. Granola - An even healthier alternative to the cereal, but costs a bit more. Eat it dry or microwave some with water or soymilk for a yummy hot cereal.
  5. Yogurt and berry parfait - Vanilla yogurt + fresh berries + sprinkle of granola
  6. Popcorn - Air popped or DIY in the microwave preferably. Go easy on the butter! Give it a shake of cinnamon sugar, parmesan cheese or chili powder for a bit of a kick
  7. Toast - 12 grain bread with peanut butter or almond butter, add sliced banana or strawberries with a drizzle of honey
  8. Pita chips - These easy to make chips are great on their own or with hummus
  9. Crackers & cheese - Not the cheapest option on the list since cheese is a bit pricy but better for you than french fries
  10. Mixed Nuts - Kids love to break things. Food + safe fun is a great combo. Don't feel like cracking them open and dealing with the mess? Buy a big bag of mixed dry roasted nuts or trail mix.
  11. Dry soy beans - Super healthy and fairly inexpensive. We got a big jar from Costco that lasted over a month.
  12. Ants on a log- Celery sticks filled with peanut butter or Cheez Whiz, use raisins or dried cranberries as the "ants"
  13. Edamame and rice-We always have a bag of frozen, peeled edamame in our freezer. Fry some up in olive oil, garlic and onion, scoop them on top of your rice and give them a salt and pepper or sprinkle of parmesan
  14. Smoothies-Make these any way you like! Milk or fruit juice blended with fruit and ice, both kinds are tasty, filling and good for you.
  15. Nachos- Throw the chips topped with cheese into the oven for a couple minutes while you chop up some tomatoes and avocado to go on top. Garnish with sour cream or squeeze half a lime over the entire thing!
  16. Quesadillas- I like to make a quick version using just 1 tortilla and whatever leftover meat, cheese and veggies are in the fridge. Bake or fry.
  17. Grilled cheese with ham. We usually do this when there isn't enough deli meat left to make a sandwich, just 1 slice is enough. Grilled cheese is great with tomato soup.
  18. Mini pizzas on a bagel, tortilla or whatever bread you have handy. Toast the bread, spread with a tablespoon of pasta sauce, add some pepperoni or ham, some cheese and then pop it into the oven just until the cheese melts. "Pizza toast" is still one of my favorite snacks.
  19. Quick mac and cheese. Cook and drain a half package of pasta. Don't rinse it, just dump it back into the pot, add a teaspoon of margarine, a splash of milk and a handful of grated cheese. Put it back on the warm burner and stir until everything is combined, salt and pepper to taste.
  20. PB and jam. A classic for a reason, it's quick, filling and tasty.
  21. Sandwich rollup- Basically a sandwich made from a tortilla. PB+jam, veggie cream cheese+deli turkey, fruit cream cheese+sliced strawberries. Make it any way you like!
If you're at home, most of these should be on hand already. Planning a day out? Bring some snacks, save a LOT of cash. Don't forget to bring your own water or Iced tea.

More of a full lunch person? Combine a few of the items to make a full meal: have a fruit, veggie and cheese plate or a smoothie with your sandwich.

What kind of snacks do you rely on?

    Tuesday, December 6, 2011

    DIY Laundry Detergent

    I've been eagerly waiting to run out of laundry soap so that I could make my own, I found this recipe quite some time ago and it seemed to be the simplest one to make. I actually halved it though just because I only had the one container to store the soap in and it takes me a good 6 months to go through the contents of it anyway. It only took about 10 minutes total to make so that was a plus for me as well!

    Here's how you do it!


    Saturday, December 3, 2011

    Orange Cleaner- Made From Orange Peels!

    Here's an awesome idea for a non-toxic cleaner that I got from one of my favorite blogs Penniless Parenting, her post on it is here.  check out her site, she has a ton of money saving ideas as well as recipes and other things.

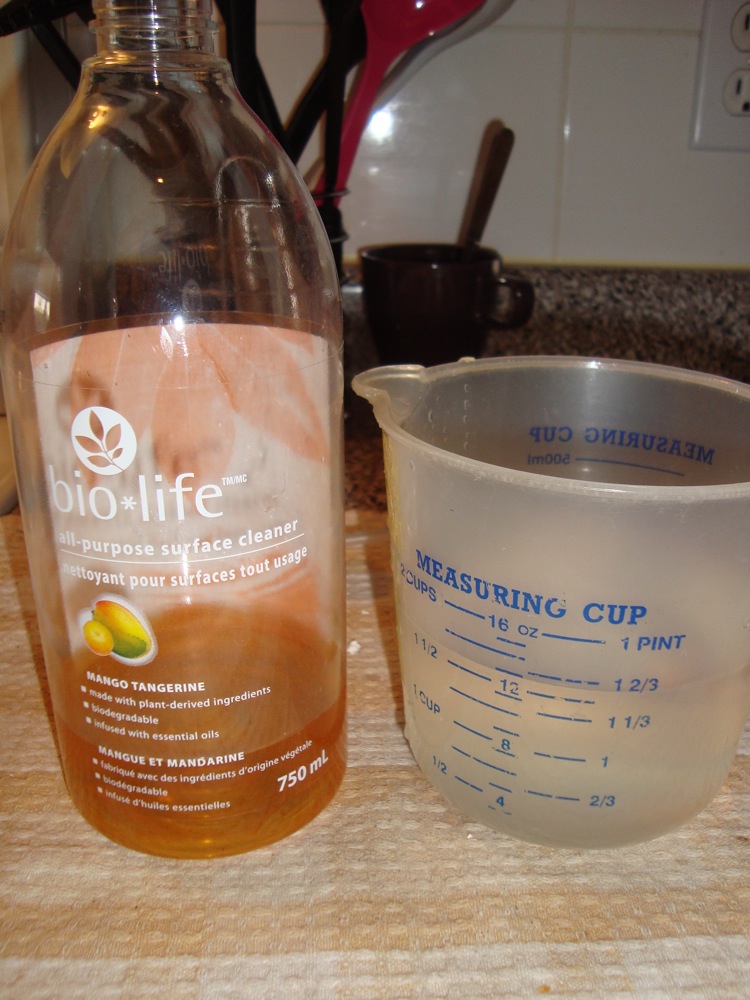
    I started buying Bio-Life products, similar to Method products when I was pregnant with Alice and couldn't stand the smell of most cleaning products. Not to mention that I didn't want to subject myself to any potentially dangerous fumes while Ladybutt was still on the inside. The Method products are fairly expensive though at over $5 a bottle and still had a weird chemical smell. I rinsed out and kept the bottle when it was all gone because I intended to use it for a different cleaner recipe but still hadn't been able to find essential oils near where I live.

    The orange cleaner recipe is simple, just orange peels and vinegar. So you're actually making use of something that would normally go straight into the garbage.


    All you have to do is pack your orange peels into whatever container you would like to use and fill it up to the top with vinegar. Then let it sit for a minimum of 2 weeks, the vinegar will pull all of the orange oil out of the peels, that's the good grease-busting stuff. I just had this small container, if you use something bigger you can keep adding peels and vinegar to it until it's full.

    Here's mine after nearly 2 months of steeping, I could have topped it up with vinegar along the way but I honestly kind of forgot about it. I wasn't really in a rush to get to it anyway since I was still using up the last of my "bad" cleaning products. No use in throwing them out and wasting the money!


    Pour the liquid out into an easy to pour container such as a bowl with a spout or large measuring cup. I let mine sit for a couple minutes so it could all drain out and then squished at the peels with a spoon to try and squeeze out as much as I could.

    I ended up with just under 3/4 of a cup of concentrated cleaner. Not too bad!


    I poured it into then measured out about 1 1/2 cups of water and added that. My cleaner still seemed pretty strong and dark colored so I went ahead and topped the bottle up with more water until it seemed right to me.
    And here's the finished orange cleaner! Nearly a full bottle of it for the price of less than a cup of vinegar! It has a nice orange smell and you can't really smell the vinegar at all which is great for me because I can't stand that smell.

    So far I've only tried it out on a stinky metal diaper pail, the garbage was changed but the smell wouldn't go away. We sprayed it down and wiped it and it got rid of the smell no problem and made the metal nice and shiny. I plan on taking all of the burner plates off of my stove at some point and seeing if this will get rid of the burnt and caked on grease that was left for us by the previous tenant. Hopefully I can get to that within the next week, I'm just always using the stove so I haven't had a chance!

    Monday, November 14, 2011

    Make Your Own Makeup Remover

    So the day has come that I've finally run out of makeup remover. My Walmart brand bottle has lasted me over a year especially since I don't even wear makeup every day anymore. I've already used up the cash I set aside every month for fun/other spending so buying a bottle would have to come out of the grocery money and I didn't really want to do that. So I checked out the DIY section on Pinterest and found a link to  this "recipe" that uses things I already have at home.

    Here's what you need:

    • 1 cup water (I used the cold Brita water)
    • 1 1/2 tablespoons baby shampoo
    • 1/8 teaspoon olive oil
    That's it! Just mix everything together and you're done. This made enough to fill my entire bottle as well as a baby cube, I didn't have any tiny jars around to store the rest.

    This worked really well, it got all of my mascara off pretty easily. And I wear A LOT of eye makeup!

    I realize that not everyone has baby shampoo around but you can get a teeny sample bottle from most pharmacies for just $1 or from the dollar store and each bottle has enough to make probably 2 or 3 batches. Sure beat the $5+ that it costs to get a small bottle of store-brand makeup remover.


    Monday, October 17, 2011

    Baked Mac and Cheese

    Baked mac and cheese is something we have for dinner fairly often, it's quick, easy, filling and an ultimate comfort food. It's also a pretty cheap meal. You can add leftover ham, bacon or veggies to it and it makes enough for leftovers for lunch the next day.

    Here's what you need:

    • 2 cups of milk
    • 1 cup of grated cheese (whatever kind you like, I usually use cheddar)
    • 1 bag of pasta (my bag is 500g)
    • about a quarter of a regular sized onion (or half of a small onion)
    • 1 large clove of garlic
    • 2 tablespoons flour
    • a handful of crackers, whatever kind you like ( I stole some of Alice's Goldfish crackers), you can also use breadcrumbs 
    • salt and pepper 
    • 1 tablespoon oil
    Start by getting the pasta on to cook, the sauce part won't take very long at all and it's easier if everything is ready at the same time.  You want the pasta a bit firm because it's going into the oven covered in sauce and it will finish cooking in there.

    Ingredients


    Finely dice the garlic and onion and fry in the oil until golden. Just a minute on medium heat should do it.

    Onion and garlic frying up
    Pour in the milk and continue cooking on medium.  I go ahead and give it a generous salt and peppering at this point, not sure why. Most people would wait until the sauce was done but I would probably forget if I waited I guess.

    Add zee malk
    When the milk is hot and starting to bubble mix the flour with about a quarter cup of water and stir it really well. This is used to thicken the sauce and you don't want chunks of flour. Blech. I realize that most people prefer to mix flour right into butter to make a roux but I find this way easier. Plus I don't want to fry the onion and garlic in a separate pan, the less dishes the better.  I've tried adding the flour first but it sticks to the onions and makes them weird and clumpy.
    Flour and water
    Dump the flour mix into the hot milk and get stirring! You will need to whisk constantly because this stuff thickens up super fast! When it seems like it's as thick as it's going to get turn the burner off and add all but a handful of cheese.
    Creamy cheese sauce
    So at this point my camera battery dies and needs to be charged.

    Pretend you see me stirring the sauce into the drained mostly cooked pasta, pouring it into a baking dish, crumbling some crackers over the top and sprinkling the last of the cheese on. Also pretend you see the dish going into the oven at 350 for 10 minutes.

    This was the aftermath of dinner when the battery was just charged enough to get a photo. It's supposed to be 6 servings but we were pretty hungry.

    Mostly eated

    Wednesday, September 7, 2011

    Fluffy Buttermilk Pancakes

    This is an excellent and quick pancake recipe. It tastes just like the expensive Aunt Jemima Complete buttermilk pancake mix but since I'm making it myself I know it has no weird additives and it doesn't have that slightly powdery taste.


    This makes 6 medium pancakes which is perfect for 2 people, or 5 medium and 3 teeny baby sized pancakes.

    Ingredients:

    • 1 1/2 cups buttermilk
    • 2 tablespoons melted butter or margarine
    • 1 egg
    • 2 tablespoons white sugar
    • 1/2 teaspoon salt
    • 1 1/4 cups flour (I used 1 cup all purpose and 1/4 cup whole wheat)
    • 1 teaspoon baking powder
    • 1/2 teaspoon baking soda
    • 1/4 teaspoon cinnamon
    Directions:
    Start by making your buttermilk if you don't have any. The buttermilk has to sit for a little while so do this first, then start heating your skillet or frying pan.


    Mix together the buttermilk, sugar and margarine. Beat in the egg. Add all of the rest of the dry stuff on top and mix until just combined.


    Scoop onto your hot grill or frying pan. The batter is pretty thick so you might have to spread it out a bit with the spoon. I cook mine on 4/medium. You can tell when the pancake needs to be flipped when it gets all bubbly on top.
    Add syrup and enjoy!


    Monday, September 5, 2011

    Homemade Sweet Cornbread

    This is great for breakfast or as a snack with tea. It's quick and easy to make and you can make it sweet or savory. This time I went with sweet but next time I may do savory with some cheese and green onion to go along with soups and chili that are coming up on the menu later in the month. Sorry, no photos of the process this time.
    • 1 cup buttermilk
    • 1/3 cup canola oil
    • 1 egg
    • 1 cup cornmeal
    • 1 cup flour
    • 1/2 cup white sugar 
    • 1 teaspoon salt
    • 3 teaspoons baking powder

    Start by making a cup of buttermilk if you don't keep any in your fridge, pour it into your bowl or mixer and add the cornmeal. Let the cornmeal soak for a couple of minutes while you get the other ingredients ready and preheat the oven to 400.

    Now add the sugar and oil, mix for a bit and then add the egg and mix. Now add all of the dry ingredients and mix until just combined. The batter should be quite thick, pour into a lightly greased pan and thump the pan on the counter to even out the batter a bit. Bake at 400 for 20-25 minutes. Mine baked for 22 minutes and was perfect.


    For savory cornbread:
    • Only use 1 tablespoon of sugar instead of 1/2 cup, you could also up the salt to 1 1/2 teaspoons if you like
    • Add 1/2 cup cheddar cheese and a chopped green onion as well as a shake or 2 of cayenne pepper
    • Try cheese and diced jalepenos
    Be sure to add these things in with the wet ingredients so that they are well mixed.

    Tuesday, August 23, 2011

    Coconut Macaroons (of failure)

    I'll start out by saying that this recipe was a semi fail, the resulting macaroons more closely resembled meringues than macaroons. Is it because my bag of coconut only had 2 3/4 cups instead of the 3 cups the recipe called for? Maybe my eggs were too big and there was therefore too much liquid added? Whatever happened the cookies still tasted really good even though they looked weird and spread out. The cookies on the the recipe I found looked just fine.

    I would try it again since my normal recipe calls for sweetened condensed milk which costs about $4 a can here and I wouldn't use for anything else. I normally have all the other ingredients around, I'll have to tweak it a bit and see how it turns out.

    • 3 cups coconut
    • 2 egg whites
    • 1/2 cup white sugar
    • 1 1/2 teaspoons vanilla

    Preheat your oven to 325. Whisk together the sugar, egg whites and vanilla. Stir in the coconut. Scoop out teaspoon sized balls and heap onto a parchment paper lined baking sheet.

    Bake for 20 minutes.


    Thursday, August 18, 2011

    Make Your Own Vanilla Extract

    I am always out of vanilla extract. I never remember to pick up a bottle when I do the rest of my groceries since I don't need to go down the baking aisle for anything else. A little bottle of the fake stuff will cost you over $3 while a teeny bottle of the real stuff runs around $10. I think the bottle is under 100ml. You might get a dozen uses out of one just using 1/2-1 teaspoon per recipe. I've been using a splash of vanilla flavored soy milk when I bake but it's just not the same.

    I remember seeing a post on Punk Rock Domestics where someone made their own vanilla extract but it was a few years ago and I couldn't find it. Google came through, there were tons of posts on how to make it, lots of different ways. I picked the method that seemed easiest and closest to what I remember seeing on PRD.

    This is super easy, you just need a little patience. So here's what you need:

    Cheap Vodka
    • Mickey of Vodka, 375ml. I bought the cheap stuff since I wasn't going to be drinking any. This one cost me about $13.
    • Vanilla beans. I didn't shop around for these because I had to walk down Hastings with booze and a baby, I just grabbed the first ones I saw and got outta Dodge. These cost me $6.99 and are Madagascar beans. I saw them later at my local market for $3.49. I'll know for next time, if I ever manage to run out of vanilla again.
    • Cutting board
    • Sharp knife. This is my cute little fruit knife.

     You need to slice down the middle of your vanilla beans so that you expose the innards and so that all the nice little flecks of vanilla bits can get into your vodka. I left the ends attached so that there are less big pieces to worry about when I go to use it.
    Slice the beans through the middle

    Now open your vodka and add the vanilla beans. Now give it a good shake. If you don't have room to shake then you know what you have to do, pour yourself a shot.

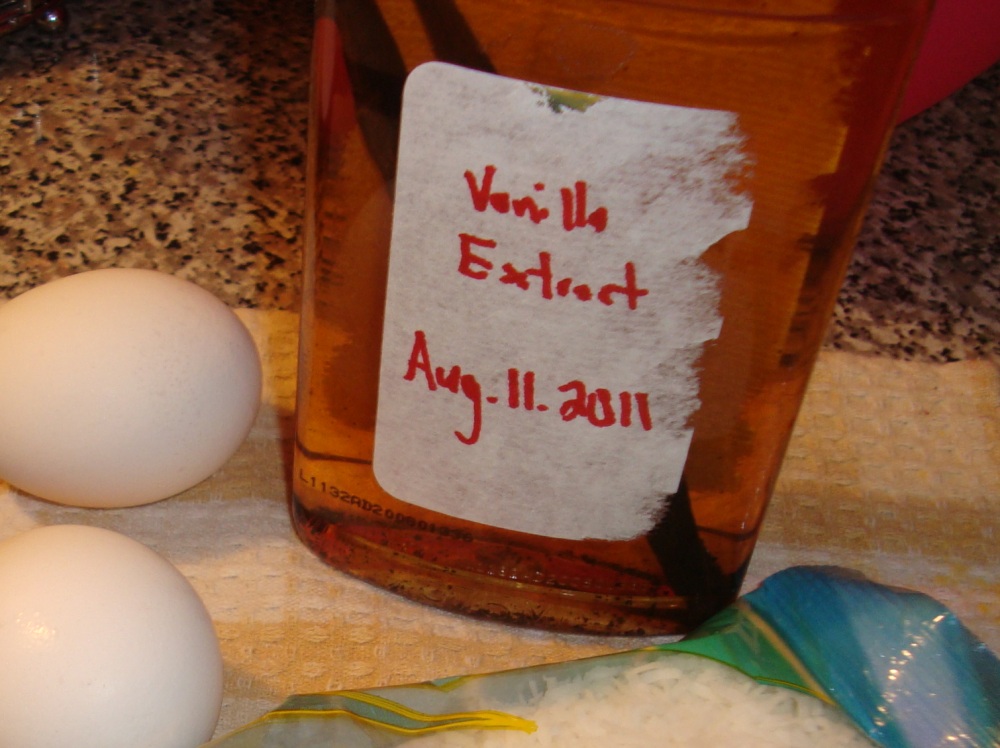
    Grab a sharpie and write the date on the bottle, I peeled off the label to make this easier and so that nobody accidentally takes a swig of vanilla extract thinking it's some fancy vodka. That would probably be pretty gross.


    Now comes the hard part. You have to wait at least 2 months until you can use this stuff. I was bad and used a bit today for some coconut macaroons. I only made it a week ago, it smells like vanilla booze but thankfully the boozeyness baked off in the oven. It didn't have a really strong vanilla flavor yet.

    The color after 7 days
    If you're an avid baker you can have a couple of these on the go, maybe a month apart so that you always have one ready. If you don't go through it that fast you can keep topping the bottle off with more vodka! I'm not sure how many times you can fill it up before it starts to get weak, you could probably just taste it every so often.

    So there's 1/3 litre of pure vanilla extract for $20! ($15 if you shop around for the best price)

    Sunday, July 24, 2011

    10 minute lunch - Tomato Basil Pasta


    This is a really quick and fresh tasting meal that's perfect for when you're short on time, low on ingredients and it's hot outside. It's light and contains no meat. It's also a great way to use up my overabundance of basil and the single ripe tomato from my plant. My tomato plant is only producing one tiny tomato at a time while my basil has become a veritable shrub.


    Saturday, June 18, 2011

    Make Your Own Reusable Baby Wipes

    I had a large square of flannelet that I got for 25 cents from the scrap bin when I went to Dressew. It was a good size at about 12x13 inches but not good enough fabric to make into a headband like my other scraps. It's been sitting there for about 2 weeks because I didn't know what to use it for.

    I finally decided that I would make some cloth wipes for Alice's cute little bum. We usually use a washcloth in a recycled refillable wipes container full of water for pee diapers but they are terrycloth and a bit rough. This flannelet is nice and soft and it made 6 wipes. It was really easy to do, I didn't even bother measuring anything.

    I just folded my fabric in half and ironed it and then folded that into 3 and ironed it again. When I unfolded it I just cut along the lines. You can round off the corners if you like but I didn't bother, I might next time because then I won't have to stop and lift the foot on the sewing machine to turn the wipes when I stitch them.


    You can just leave them like this if you like but they will fray around the edges when they go through the washer. You can use pinking shears on all of them or you can sew the edges. I don't have pinking shears so I sewed the edges using a zigzag stitch. I sewed them upside down because I like the look of the bottom of the stitch better.


    Then I ironed them again (top picture) just so they would be a neat little stack. There we go, 6 reusable wipes for just 25 cents!