I've been eagerly waiting to run out of laundry soap so that I could make my own, I found this recipe quite some time ago and it seemed to be the simplest one to make. I actually halved it though just because I only had the one container to store the soap in and it takes me a good 6 months to go through the contents of it anyway. It only took about 10 minutes total to make so that was a plus for me as well!
Here's how you do it!
The surprising adventures of a young self-employed family!
Waste less. Save more. Get smarter. Make things.
Showing posts with label DIY. Show all posts
Tuesday, December 6, 2011
Saturday, December 3, 2011
Orange Cleaner- Made From Orange Peels!
Here's an awesome idea for a non-toxic cleaner that I got from one of my favorite blogs Penniless Parenting, her post on it is here. check out her site, she has a ton of money saving ideas as well as recipes and other things.
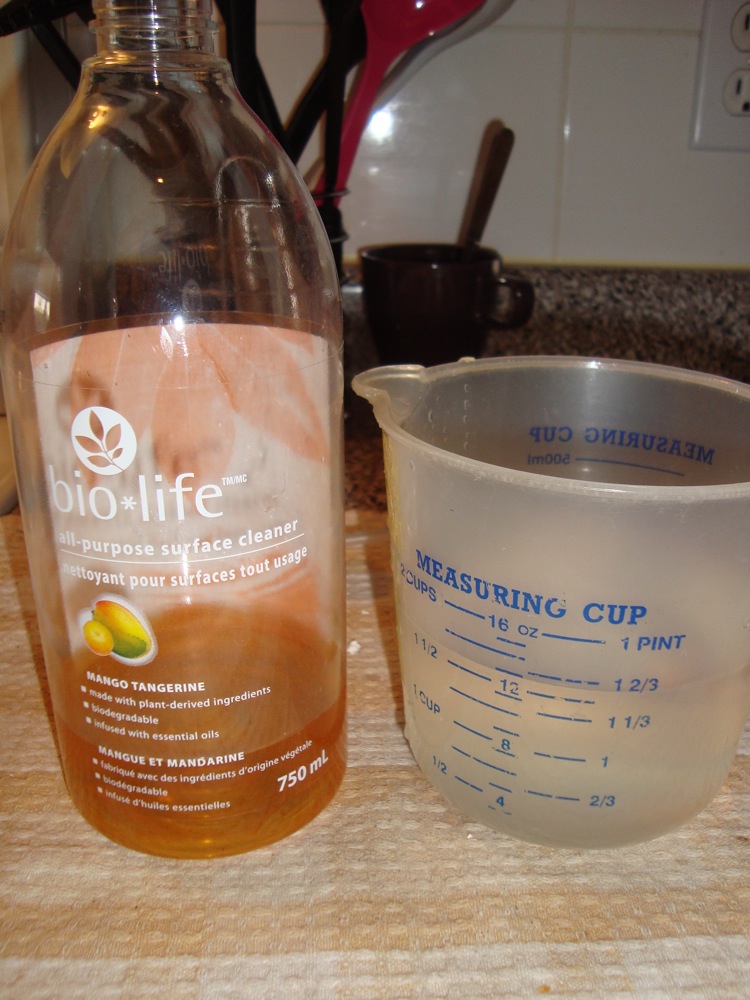
I started buying Bio-Life products, similar to Method products when I was pregnant with Alice and couldn't stand the smell of most cleaning products. Not to mention that I didn't want to subject myself to any potentially dangerous fumes while Ladybutt was still on the inside. The Method products are fairly expensive though at over $5 a bottle and still had a weird chemical smell. I rinsed out and kept the bottle when it was all gone because I intended to use it for a different cleaner recipe but still hadn't been able to find essential oils near where I live.
The orange cleaner recipe is simple, just orange peels and vinegar. So you're actually making use of something that would normally go straight into the garbage.
All you have to do is pack your orange peels into whatever container you would like to use and fill it up to the top with vinegar. Then let it sit for a minimum of 2 weeks, the vinegar will pull all of the orange oil out of the peels, that's the good grease-busting stuff. I just had this small container, if you use something bigger you can keep adding peels and vinegar to it until it's full.
Here's mine after nearly 2 months of steeping, I could have topped it up with vinegar along the way but I honestly kind of forgot about it. I wasn't really in a rush to get to it anyway since I was still using up the last of my "bad" cleaning products. No use in throwing them out and wasting the money!
Pour the liquid out into an easy to pour container such as a bowl with a spout or large measuring cup. I let mine sit for a couple minutes so it could all drain out and then squished at the peels with a spoon to try and squeeze out as much as I could.
I ended up with just under 3/4 of a cup of concentrated cleaner. Not too bad!
I poured it into then measured out about 1 1/2 cups of water and added that. My cleaner still seemed pretty strong and dark colored so I went ahead and topped the bottle up with more water until it seemed right to me.
And here's the finished orange cleaner! Nearly a full bottle of it for the price of less than a cup of vinegar! It has a nice orange smell and you can't really smell the vinegar at all which is great for me because I can't stand that smell.
So far I've only tried it out on a stinky metal diaper pail, the garbage was changed but the smell wouldn't go away. We sprayed it down and wiped it and it got rid of the smell no problem and made the metal nice and shiny. I plan on taking all of the burner plates off of my stove at some point and seeing if this will get rid of the burnt and caked on grease that was left for us by the previous tenant. Hopefully I can get to that within the next week, I'm just always using the stove so I haven't had a chance!
I started buying Bio-Life products, similar to Method products when I was pregnant with Alice and couldn't stand the smell of most cleaning products. Not to mention that I didn't want to subject myself to any potentially dangerous fumes while Ladybutt was still on the inside. The Method products are fairly expensive though at over $5 a bottle and still had a weird chemical smell. I rinsed out and kept the bottle when it was all gone because I intended to use it for a different cleaner recipe but still hadn't been able to find essential oils near where I live.
The orange cleaner recipe is simple, just orange peels and vinegar. So you're actually making use of something that would normally go straight into the garbage.
All you have to do is pack your orange peels into whatever container you would like to use and fill it up to the top with vinegar. Then let it sit for a minimum of 2 weeks, the vinegar will pull all of the orange oil out of the peels, that's the good grease-busting stuff. I just had this small container, if you use something bigger you can keep adding peels and vinegar to it until it's full.
Here's mine after nearly 2 months of steeping, I could have topped it up with vinegar along the way but I honestly kind of forgot about it. I wasn't really in a rush to get to it anyway since I was still using up the last of my "bad" cleaning products. No use in throwing them out and wasting the money!
Pour the liquid out into an easy to pour container such as a bowl with a spout or large measuring cup. I let mine sit for a couple minutes so it could all drain out and then squished at the peels with a spoon to try and squeeze out as much as I could.
I ended up with just under 3/4 of a cup of concentrated cleaner. Not too bad!
I poured it into then measured out about 1 1/2 cups of water and added that. My cleaner still seemed pretty strong and dark colored so I went ahead and topped the bottle up with more water until it seemed right to me.
And here's the finished orange cleaner! Nearly a full bottle of it for the price of less than a cup of vinegar! It has a nice orange smell and you can't really smell the vinegar at all which is great for me because I can't stand that smell.
So far I've only tried it out on a stinky metal diaper pail, the garbage was changed but the smell wouldn't go away. We sprayed it down and wiped it and it got rid of the smell no problem and made the metal nice and shiny. I plan on taking all of the burner plates off of my stove at some point and seeing if this will get rid of the burnt and caked on grease that was left for us by the previous tenant. Hopefully I can get to that within the next week, I'm just always using the stove so I haven't had a chance!
Monday, November 14, 2011
Make Your Own Makeup Remover
So the day has come that I've finally run out of makeup remover. My Walmart brand bottle has lasted me over a year especially since I don't even wear makeup every day anymore. I've already used up the cash I set aside every month for fun/other spending so buying a bottle would have to come out of the grocery money and I didn't really want to do that. So I checked out the DIY section on Pinterest and found a link to this "recipe" that uses things I already have at home.
Here's what you need:
This worked really well, it got all of my mascara off pretty easily. And I wear A LOT of eye makeup!
I realize that not everyone has baby shampoo around but you can get a teeny sample bottle from most pharmacies for just $1 or from the dollar store and each bottle has enough to make probably 2 or 3 batches. Sure beat the $5+ that it costs to get a small bottle of store-brand makeup remover.
Here's what you need:
- 1 cup water (I used the cold Brita water)
- 1 1/2 tablespoons baby shampoo
- 1/8 teaspoon olive oil
This worked really well, it got all of my mascara off pretty easily. And I wear A LOT of eye makeup!
I realize that not everyone has baby shampoo around but you can get a teeny sample bottle from most pharmacies for just $1 or from the dollar store and each bottle has enough to make probably 2 or 3 batches. Sure beat the $5+ that it costs to get a small bottle of store-brand makeup remover.
Thursday, August 18, 2011
Make Your Own Vanilla Extract
I am always out of vanilla extract. I never remember to pick up a bottle when I do the rest of my groceries since I don't need to go down the baking aisle for anything else. A little bottle of the fake stuff will cost you over $3 while a teeny bottle of the real stuff runs around $10. I think the bottle is under 100ml. You might get a dozen uses out of one just using 1/2-1 teaspoon per recipe. I've been using a splash of vanilla flavored soy milk when I bake but it's just not the same.
I remember seeing a post on Punk Rock Domestics where someone made their own vanilla extract but it was a few years ago and I couldn't find it. Google came through, there were tons of posts on how to make it, lots of different ways. I picked the method that seemed easiest and closest to what I remember seeing on PRD.
This is super easy, you just need a little patience. So here's what you need:
You need to slice down the middle of your vanilla beans so that you expose the innards and so that all the nice little flecks of vanilla bits can get into your vodka. I left the ends attached so that there are less big pieces to worry about when I go to use it.
Now open your vodka and add the vanilla beans. Now give it a good shake. If you don't have room to shake then you know what you have to do, pour yourself a shot.
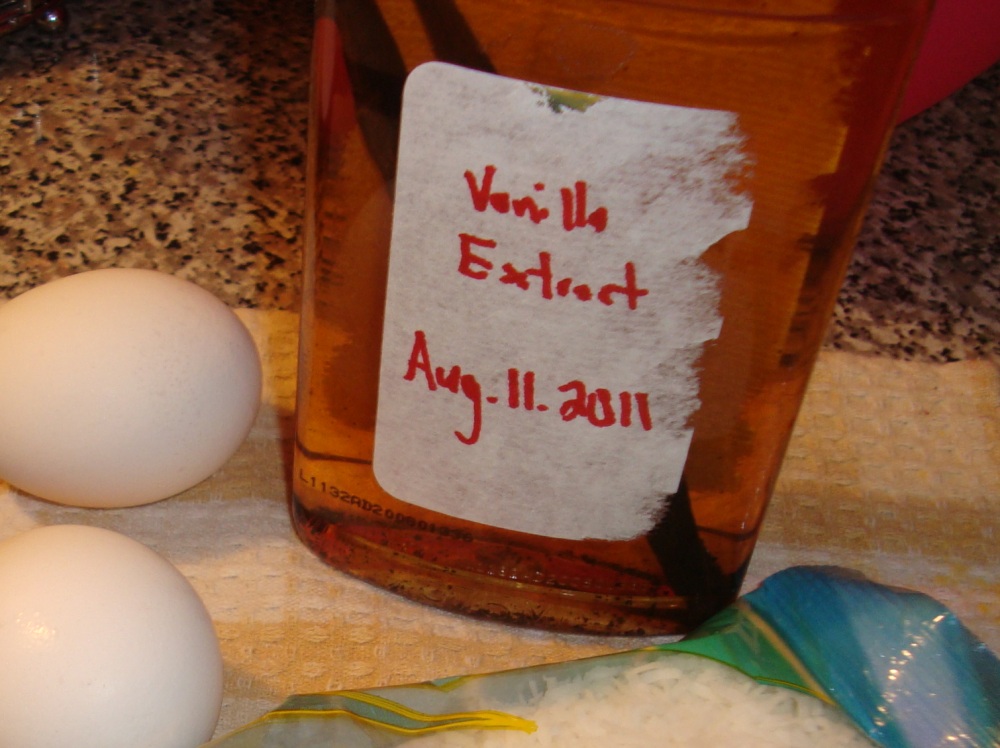
Grab a sharpie and write the date on the bottle, I peeled off the label to make this easier and so that nobody accidentally takes a swig of vanilla extract thinking it's some fancy vodka. That would probably be pretty gross.
Now comes the hard part. You have to wait at least 2 months until you can use this stuff. I was bad and used a bit today for some coconut macaroons. I only made it a week ago, it smells like vanilla booze but thankfully the boozeyness baked off in the oven. It didn't have a really strong vanilla flavor yet.
If you're an avid baker you can have a couple of these on the go, maybe a month apart so that you always have one ready. If you don't go through it that fast you can keep topping the bottle off with more vodka! I'm not sure how many times you can fill it up before it starts to get weak, you could probably just taste it every so often.
So there's 1/3 litre of pure vanilla extract for $20! ($15 if you shop around for the best price)
I remember seeing a post on Punk Rock Domestics where someone made their own vanilla extract but it was a few years ago and I couldn't find it. Google came through, there were tons of posts on how to make it, lots of different ways. I picked the method that seemed easiest and closest to what I remember seeing on PRD.
This is super easy, you just need a little patience. So here's what you need:
| Cheap Vodka |
- Mickey of Vodka, 375ml. I bought the cheap stuff since I wasn't going to be drinking any. This one cost me about $13.
- Vanilla beans. I didn't shop around for these because I had to walk down Hastings with booze and a baby, I just grabbed the first ones I saw and got outta Dodge. These cost me $6.99 and are Madagascar beans. I saw them later at my local market for $3.49. I'll know for next time, if I ever manage to run out of vanilla again.
- Cutting board
- Sharp knife. This is my cute little fruit knife.
You need to slice down the middle of your vanilla beans so that you expose the innards and so that all the nice little flecks of vanilla bits can get into your vodka. I left the ends attached so that there are less big pieces to worry about when I go to use it.
| Slice the beans through the middle |
Now open your vodka and add the vanilla beans. Now give it a good shake. If you don't have room to shake then you know what you have to do, pour yourself a shot.
Grab a sharpie and write the date on the bottle, I peeled off the label to make this easier and so that nobody accidentally takes a swig of vanilla extract thinking it's some fancy vodka. That would probably be pretty gross.
Now comes the hard part. You have to wait at least 2 months until you can use this stuff. I was bad and used a bit today for some coconut macaroons. I only made it a week ago, it smells like vanilla booze but thankfully the boozeyness baked off in the oven. It didn't have a really strong vanilla flavor yet.
![]() |
| The color after 7 days |
So there's 1/3 litre of pure vanilla extract for $20! ($15 if you shop around for the best price)
Wednesday, July 13, 2011
Ghetto laundry and other things that have been happening this week
I've gotten really far behind in laundry, to the point that we ran out of underwear and clean towels. Not for lack of trying, our building only has 2 washers for everybody to share and one of them is out of order and has been for a week. So I did a load of tub laundry 2 days ago and then I didn't bother to take out any more money for the washing machines. And today I did another load of tub laundry. And in 2 more days I guess I'll do another. It's not really that bad, I'm still 2 loads behind, the towels and sheets and a bunch of clothes are still piled in the bedroom.
I'll probably continue to do this, it will be easier once I get through the pile and can do smaller amounts so my poor drying rack isn't overburdened. It's a lot harder to get the clothes as dry as a spin cycle in the washer would just by wringing them out.
Plus saving the money is good, our laundry costs will be going from about $50 a month to $0 a month.
I got another surprise cheque for $400! I forgot about the quarterly HST return! So that and the MSP return are going onto the credit card and taking a nice big dent out of it!
Mail seems to be moving now and I finally got the clips I ordered at the beginning of June. Still waiting on my business cards, the only thing that is holding up the opening of my Etsy shop.
This week I also made Alice a cute pajama dress using an old t-shirt of mine using this tutorial from Nap Time Crafters. I didn't bother with cinching the waist or adding flowers since it was just for jammies. She promptly barfed on it so it's somewhere in the massive laundry pile. We did manage to get a photo of it first!
We're having giant Chicken Caesar salads for dinner. I made my own croutons because I needed to use up a quarter loaf of no knead bread from a couple days ago. I used Pioneer Woman's recipe. I love this woman, she's awesome. I've made tons of recipes that she's posted.
I guess that's it for today, have to try to get the baby beast to sleep.
I'll probably continue to do this, it will be easier once I get through the pile and can do smaller amounts so my poor drying rack isn't overburdened. It's a lot harder to get the clothes as dry as a spin cycle in the washer would just by wringing them out.
Plus saving the money is good, our laundry costs will be going from about $50 a month to $0 a month.
I got another surprise cheque for $400! I forgot about the quarterly HST return! So that and the MSP return are going onto the credit card and taking a nice big dent out of it!
Mail seems to be moving now and I finally got the clips I ordered at the beginning of June. Still waiting on my business cards, the only thing that is holding up the opening of my Etsy shop.
This week I also made Alice a cute pajama dress using an old t-shirt of mine using this tutorial from Nap Time Crafters. I didn't bother with cinching the waist or adding flowers since it was just for jammies. She promptly barfed on it so it's somewhere in the massive laundry pile. We did manage to get a photo of it first!
We're having giant Chicken Caesar salads for dinner. I made my own croutons because I needed to use up a quarter loaf of no knead bread from a couple days ago. I used Pioneer Woman's recipe. I love this woman, she's awesome. I've made tons of recipes that she's posted.
I guess that's it for today, have to try to get the baby beast to sleep.
Saturday, June 18, 2011
Make Your Own Reusable Baby Wipes
I had a large square of flannelet that I got for 25 cents from the scrap bin when I went to Dressew. It was a good size at about 12x13 inches but not good enough fabric to make into a headband like my other scraps. It's been sitting there for about 2 weeks because I didn't know what to use it for.
I finally decided that I would make some cloth wipes for Alice's cute little bum. We usually use a washcloth in a recycled refillable wipes container full of water for pee diapers but they are terrycloth and a bit rough. This flannelet is nice and soft and it made 6 wipes. It was really easy to do, I didn't even bother measuring anything.
I just folded my fabric in half and ironed it and then folded that into 3 and ironed it again. When I unfolded it I just cut along the lines. You can round off the corners if you like but I didn't bother, I might next time because then I won't have to stop and lift the foot on the sewing machine to turn the wipes when I stitch them.
You can just leave them like this if you like but they will fray around the edges when they go through the washer. You can use pinking shears on all of them or you can sew the edges. I don't have pinking shears so I sewed the edges using a zigzag stitch. I sewed them upside down because I like the look of the bottom of the stitch better.
Then I ironed them again (top picture) just so they would be a neat little stack. There we go, 6 reusable wipes for just 25 cents!
I finally decided that I would make some cloth wipes for Alice's cute little bum. We usually use a washcloth in a recycled refillable wipes container full of water for pee diapers but they are terrycloth and a bit rough. This flannelet is nice and soft and it made 6 wipes. It was really easy to do, I didn't even bother measuring anything.
I just folded my fabric in half and ironed it and then folded that into 3 and ironed it again. When I unfolded it I just cut along the lines. You can round off the corners if you like but I didn't bother, I might next time because then I won't have to stop and lift the foot on the sewing machine to turn the wipes when I stitch them.
You can just leave them like this if you like but they will fray around the edges when they go through the washer. You can use pinking shears on all of them or you can sew the edges. I don't have pinking shears so I sewed the edges using a zigzag stitch. I sewed them upside down because I like the look of the bottom of the stitch better.
Then I ironed them again (top picture) just so they would be a neat little stack. There we go, 6 reusable wipes for just 25 cents!
Friday, June 3, 2011
Make Your Own Sugar Scrub
[post by Holly]
Summer is here and before I get into dresses and sandals for the next few months, I need to scrub off the rough stuff from my feet.
Body scrubs are surprisingly expensive, $4.99 and higher for a jar that would fit in the palm of my hand! Looking at the ingredients I realized that they're all very similar. Some sort of oil, sugar or other abrasive, essential oil and a fragrance. Everything else appeared to be preservatives. Foot scrubs appeared to have the same ingredients with the addition of some sort of menthol.
It seemed like it would be pretty easy to make my own based on what the store bought ones contain. I had everything at home as far as I knew. I did some Googling and came up with a lot of different recipes and adapted a few to create what I think is the easiest method.
Add your oil to your sugar a little at a time until all of the sugar has a bit of oil but isn't liquid, you want it to still have a crumbly texture. Then I added my half vial of perfume oil, if you're using essential oil just add a couple drops and stir it up really well.
I pre-measured my sugar into my jar to make sure it would fit, my jar would hold a half cup. I also measured my oil as I was adding it, 4 tablespoons was perfect. My olive oil gave the scrub a greenish tint which I chose not to enhance with food coloring but green or blue would look great.
I just used it in the shower and it was pretty good! While using it I could really smell the olive oil, but once I got out and dried off I smelled like the perfume. Left me feeling exfoliated and I didn't need to use lotion afterwards!
This scrub is comparable to expensive scrubs I've used but because it contains no glycerin it doesn't leave any kind of slippery or soapy residue.
Try not to get water in the jar, this can be tricky in the shower but your scrub will last much longer.
Summer is here and before I get into dresses and sandals for the next few months, I need to scrub off the rough stuff from my feet.
Body scrubs are surprisingly expensive, $4.99 and higher for a jar that would fit in the palm of my hand! Looking at the ingredients I realized that they're all very similar. Some sort of oil, sugar or other abrasive, essential oil and a fragrance. Everything else appeared to be preservatives. Foot scrubs appeared to have the same ingredients with the addition of some sort of menthol.
It seemed like it would be pretty easy to make my own based on what the store bought ones contain. I had everything at home as far as I knew. I did some Googling and came up with a lot of different recipes and adapted a few to create what I think is the easiest method.
Olive Oil Sugar Scrub
So here's what you need:- Oil: olive, coconut or sweet almond seemed to be the top three: I used olive oil because that was what I happened to have in my cupboard. Every recipe advised against using canola or other high viscosity oils
- Sugar: I used regular light granulated white sugar in mine. You can use raw sugar if you want more scrubbing power or finer ground for a lighter scrub. Don't use brown sugar, it gets goopy and nasty because it contains molases.
- Essential oil or perfume oil: I didn't have any but I did have some perfume oil samples from The Morbid The Merrier. This vial (Voix De Ville) was half full ( 0.5ml) and was enough to cover the olive oil scent of my scrub
- A bowl to mix your scrub in
- A cute jar to put your finished product into
Add your oil to your sugar a little at a time until all of the sugar has a bit of oil but isn't liquid, you want it to still have a crumbly texture. Then I added my half vial of perfume oil, if you're using essential oil just add a couple drops and stir it up really well.
I pre-measured my sugar into my jar to make sure it would fit, my jar would hold a half cup. I also measured my oil as I was adding it, 4 tablespoons was perfect. My olive oil gave the scrub a greenish tint which I chose not to enhance with food coloring but green or blue would look great.
I just used it in the shower and it was pretty good! While using it I could really smell the olive oil, but once I got out and dried off I smelled like the perfume. Left me feeling exfoliated and I didn't need to use lotion afterwards!
This scrub is comparable to expensive scrubs I've used but because it contains no glycerin it doesn't leave any kind of slippery or soapy residue.
Try not to get water in the jar, this can be tricky in the shower but your scrub will last much longer.
Subscribe to:
Posts (Atom)